Are you looking for a way to remotely access your Raspberry Pi from your Mac? Whether you're a tech enthusiast, a developer, or simply someone who wants to streamline their workflow, remotely accessing your Raspberry Pi can save you time and effort. With the right tools and techniques, you can control your Raspberry Pi from your Mac as if you were sitting right in front of it. This guide will walk you through everything you need to know, from setting up your Raspberry Pi to troubleshooting common issues.
Remote access to your Raspberry Pi opens up a world of possibilities. You can manage files, run commands, and even develop applications without needing physical access to your device. This is particularly useful if your Raspberry Pi is located in a remote location or if you simply want to work more efficiently. In this article, we’ll explore multiple methods for remote access, including SSH, VNC, and more, ensuring that you have all the tools you need to succeed.
By the end of this guide, you'll have a clear understanding of how to remotely access your Raspberry Pi from your Mac. We’ll cover everything from initial setup to advanced configurations, ensuring that you can confidently manage your Raspberry Pi from anywhere. Let’s dive into the details and unlock the full potential of your Raspberry Pi!
Read also:Catriona Gray And Sam Milby A Journey Through Love Talent And Stardom
Table of Contents
Introduction to Remote Access
Remote access allows you to interact with your Raspberry Pi from another device, such as your Mac, without needing to be physically present. This is especially useful for managing servers, automating tasks, or troubleshooting issues. Remote access can be achieved through various protocols, including SSH (Secure Shell) for command-line access and VNC (Virtual Network Computing) for graphical access.
Why is remote access important? For starters, it provides flexibility. Whether you're at home, in the office, or traveling, you can manage your Raspberry Pi from anywhere with an internet connection. Additionally, remote access can enhance security by allowing you to lock down physical access to your device while still maintaining control over it.
Before diving into the technical details, it’s important to understand the basics of remote access. This includes knowing how to configure your Raspberry Pi, ensuring your network is properly set up, and understanding the tools you’ll use to establish the connection. Let’s start by preparing your Raspberry Pi for remote access.
Preparing Your Raspberry Pi
Before you can remotely access your Raspberry Pi, you need to ensure that it’s properly set up. This involves installing the operating system, updating software, and configuring network settings. Here’s a step-by-step guide to get you started:
- Install the Operating System: Download the latest version of Raspberry Pi OS from the official website and flash it onto your SD card using tools like Balena Etcher.
- Connect to Wi-Fi: Use the Raspberry Pi Imager or manually configure the Wi-Fi settings to ensure your device is connected to the internet.
- Update Software: Run
sudo apt update && sudo apt upgradeto ensure your system is up to date.
Configuring Network Settings
To enable remote access, your Raspberry Pi needs a stable network connection. You can connect via Ethernet for a wired connection or Wi-Fi for wireless access. Ensure that your Raspberry Pi has a static IP address to make it easier to locate on your network.
Testing the Setup
Once your Raspberry Pi is set up, test its functionality by logging in locally. Open a terminal and run basic commands like ping google.com to ensure internet connectivity. This step ensures that your device is ready for remote access.
Read also:Kendrick Lamar Dot Unveiling The Genius Behind The Music
Enabling SSH on Raspberry Pi
SSH is one of the most common methods for remote access. It allows you to execute commands on your Raspberry Pi via a terminal interface. Here’s how to enable SSH:
- Using Raspberry Pi Configuration: Open the Raspberry Pi Configuration tool, navigate to the "Interfaces" tab, and enable SSH.
- Using raspi-config: Run
sudo raspi-configin the terminal, select "Interfacing Options," and enable SSH. - Creating an SSH File: Place an empty file named "ssh" in the boot partition of your SD card before booting your Raspberry Pi.
Verifying SSH Access
After enabling SSH, verify that it’s working by attempting to connect from another device on the same network. Use the command ssh pi@raspberrypi.local to test the connection.
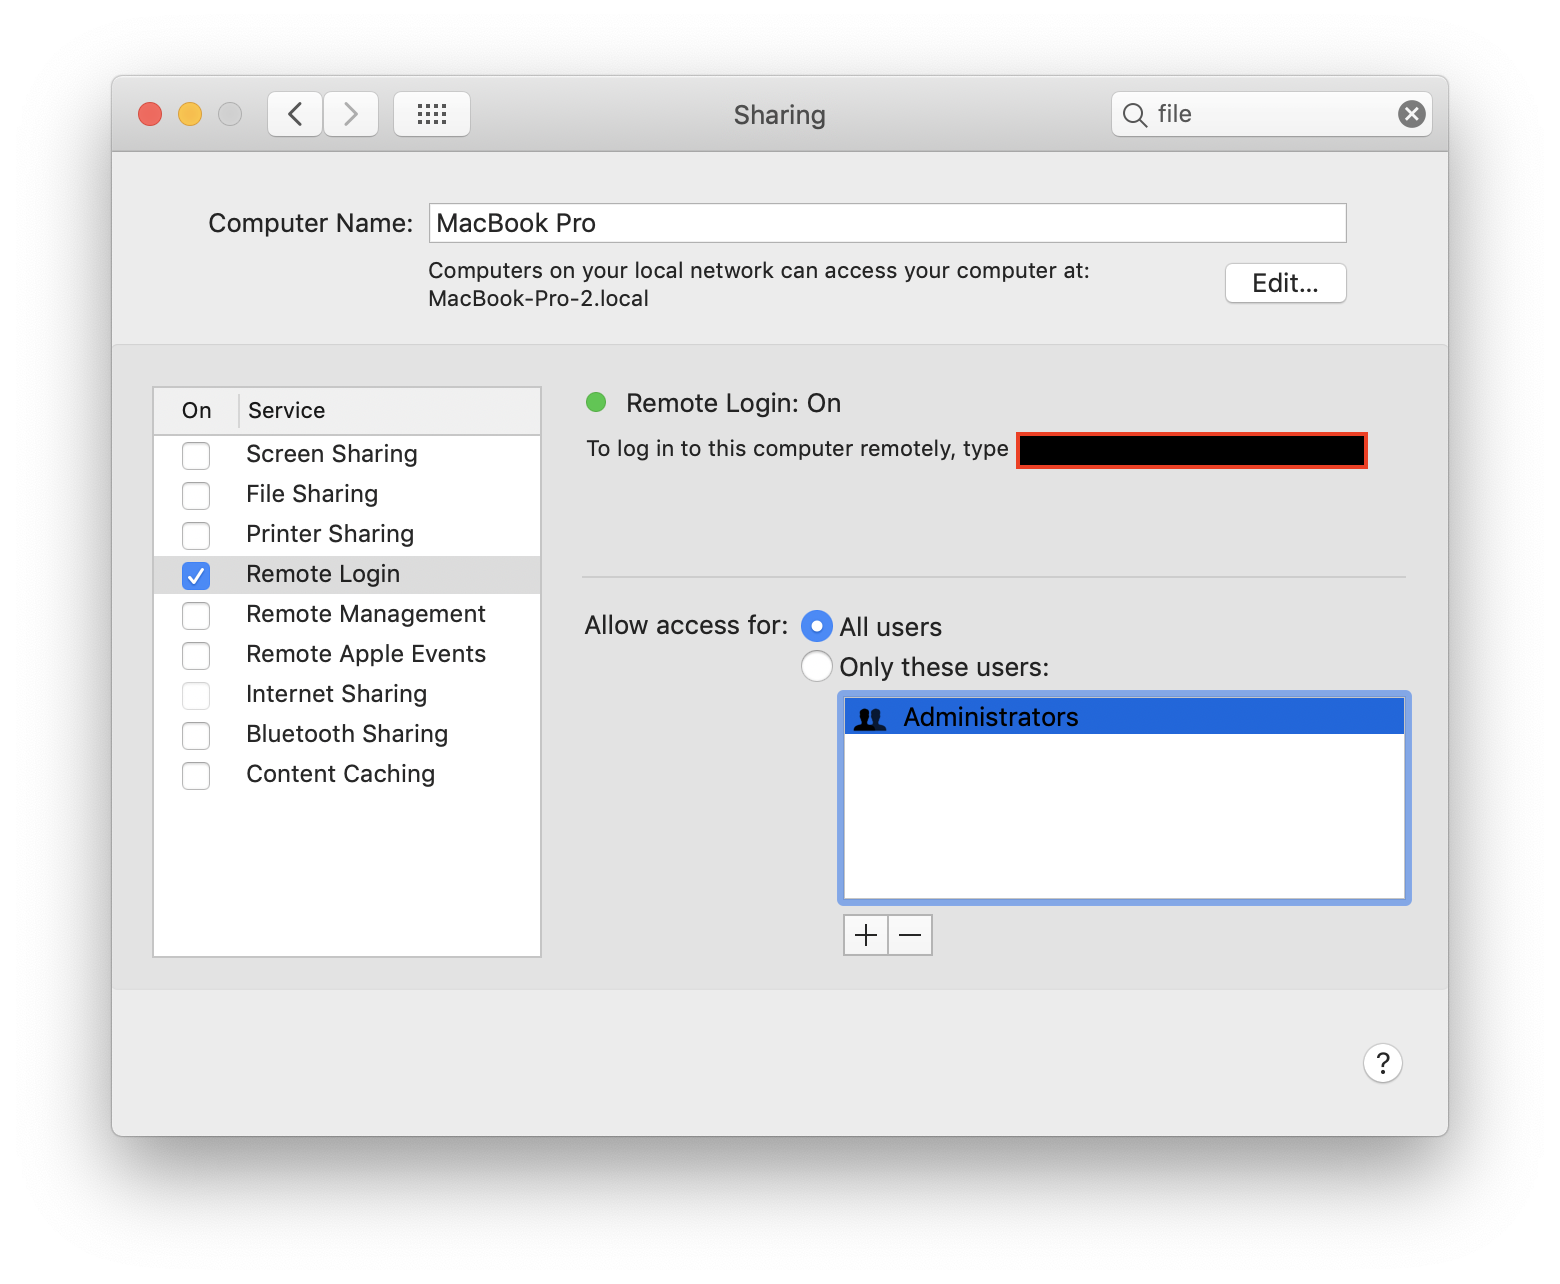
Connecting via SSH from Mac
Once SSH is enabled on your Raspberry Pi, you can connect to it from your Mac. Here’s how:
- Open Terminal: Launch the Terminal application on your Mac.
- Enter the SSH Command: Use the command
ssh pi@raspberrypi.local. Replace "raspberrypi.local" with your Raspberry Pi’s IP address if necessary. - Authenticate: Enter the default password ("raspberry") or the password you set during setup.
Managing Files via SSH
Beyond running commands, SSH allows you to transfer files between your Mac and Raspberry Pi using tools like SCP (Secure Copy Protocol). For example, use scp /path/to/local/file pi@raspberrypi.local:/path/to/remote/directory to upload files.
Using VNC for Graphical Access
If you need a graphical interface, VNC is the way to go. It allows you to remotely access the desktop environment of your Raspberry Pi. Here’s how to set it up:
- Install VNC Server: Run
sudo apt install realvnc-vnc-serveron your Raspberry Pi. - Enable VNC: Use the Raspberry Pi Configuration tool or
raspi-configto enable VNC. - Download VNC Viewer: Install the VNC Viewer application on your Mac from the official website.
Connecting via VNC
Launch VNC Viewer on your Mac, enter your Raspberry Pi’s IP address, and authenticate with your credentials. You’ll now have full graphical access to your Raspberry Pi.
Alternative Methods for Remote Access
Besides SSH and VNC, there are other methods for remote access:
- Web-Based Interfaces: Tools like Cockpit provide web-based access to your Raspberry Pi.
- Remote Desktop Protocol (RDP): Use RDP for Windows-like remote access.
- Third-Party Services: Platforms like ngrok can expose your Raspberry Pi to the internet securely.
Choosing the Right Method
The best method depends on your needs. For command-line tasks, SSH is ideal. For graphical tasks, VNC is better. Evaluate your requirements before choosing.
Troubleshooting Common Issues
Remote access isn’t always smooth. Here are some common issues and their solutions:
- Connection Refused: Ensure SSH or VNC is enabled and your firewall isn’t blocking the connection.
- Slow Performance: Optimize your network or reduce the resolution in VNC settings.
- Authentication Errors: Double-check your username and password, and reset them if necessary.
Securing Your Remote Connection
Security is crucial when accessing your Raspberry Pi remotely. Here are some tips:
- Change Default Passwords: Always change the default "pi" password.
- Use Key-Based Authentication: Set up SSH keys for a more secure login.
- Enable a Firewall: Use tools like UFW to restrict access to specific ports.
Monitoring Access
Regularly check your Raspberry Pi’s logs to detect unauthorized access attempts. Use commands like sudo journalctl to review logs.
Advanced Remote Access Features
For power users, there are advanced features to explore:
- Port Forwarding: Access your Raspberry Pi from outside your local network.
- Dynamic DNS: Use services like No-IP to assign a domain name to your Raspberry Pi.
- Automation Scripts: Write scripts to automate tasks during remote sessions.
Exploring APIs
Integrate your Raspberry Pi with APIs to enable remote control via web applications or mobile apps.
Conclusion and Next Steps
Remotely accessing your Raspberry Pi from your Mac is a powerful way to enhance your workflow and manage your projects efficiently. By following the steps outlined in this guide, you can set up secure and reliable remote access using methods like SSH and VNC. Whether you’re troubleshooting issues, managing files, or developing applications, remote access provides the flexibility you need.
Now that you’ve learned how to remotely access your Raspberry Pi, it’s time to put your knowledge into practice. Experiment with different methods, explore advanced features, and secure your setup to protect your device. If you found this guide helpful, consider sharing it with others or leaving a comment below to share your experiences. For more tips and tutorials, check out our other articles on Raspberry Pi and remote computing.