Are you looking to build a remote IoT VPC network using Raspberry Pi and free AWS services? If so, you're in the right place. In this article, we will guide you through the process of setting up a secure, scalable, and cost-effective IoT network using Amazon Web Services (AWS) and Raspberry Pi. Whether you're a hobbyist, developer, or business owner, this setup can help you manage IoT devices efficiently while leveraging the power of cloud computing.
Remote IoT VPC networks are becoming increasingly popular due to their flexibility and scalability. By combining the processing power of Raspberry Pi with the robust infrastructure of AWS, you can create a system that is both reliable and cost-effective. This guide will walk you through every step, from setting up your Raspberry Pi to configuring your AWS Virtual Private Cloud (VPC) for IoT applications.
In this article, we will cover everything from the basics of IoT and VPC to advanced configurations that ensure your network is secure and efficient. By the end of this guide, you'll have a fully functional IoT network that is ready to handle real-world applications. Let’s dive into the details and get started!
Read also:Damon Thomas And Kim Kardashian A Deep Dive Into Their Relationship And Impact
Table of Contents
Introduction to IoT and VPC
The Internet of Things (IoT) refers to the network of interconnected devices that communicate and exchange data over the internet. These devices range from simple sensors to complex industrial machinery. IoT applications are transforming industries such as healthcare, agriculture, and manufacturing by enabling real-time data collection and analysis.
A Virtual Private Cloud (VPC) is a secure, isolated private cloud hosted within a public cloud. AWS VPC allows users to define their own virtual network within the AWS ecosystem. This provides complete control over IP address ranges, subnets, route tables, and network gateways. Combining IoT with AWS VPC ensures secure and efficient communication between devices and the cloud.
By integrating IoT devices like Raspberry Pi with AWS VPC, you can create a scalable and secure network that supports various applications. This setup is particularly useful for remote monitoring, automation, and data analysis tasks. Let’s explore why Raspberry Pi and AWS are the perfect combination for this purpose.
Why Use Raspberry Pi and AWS?
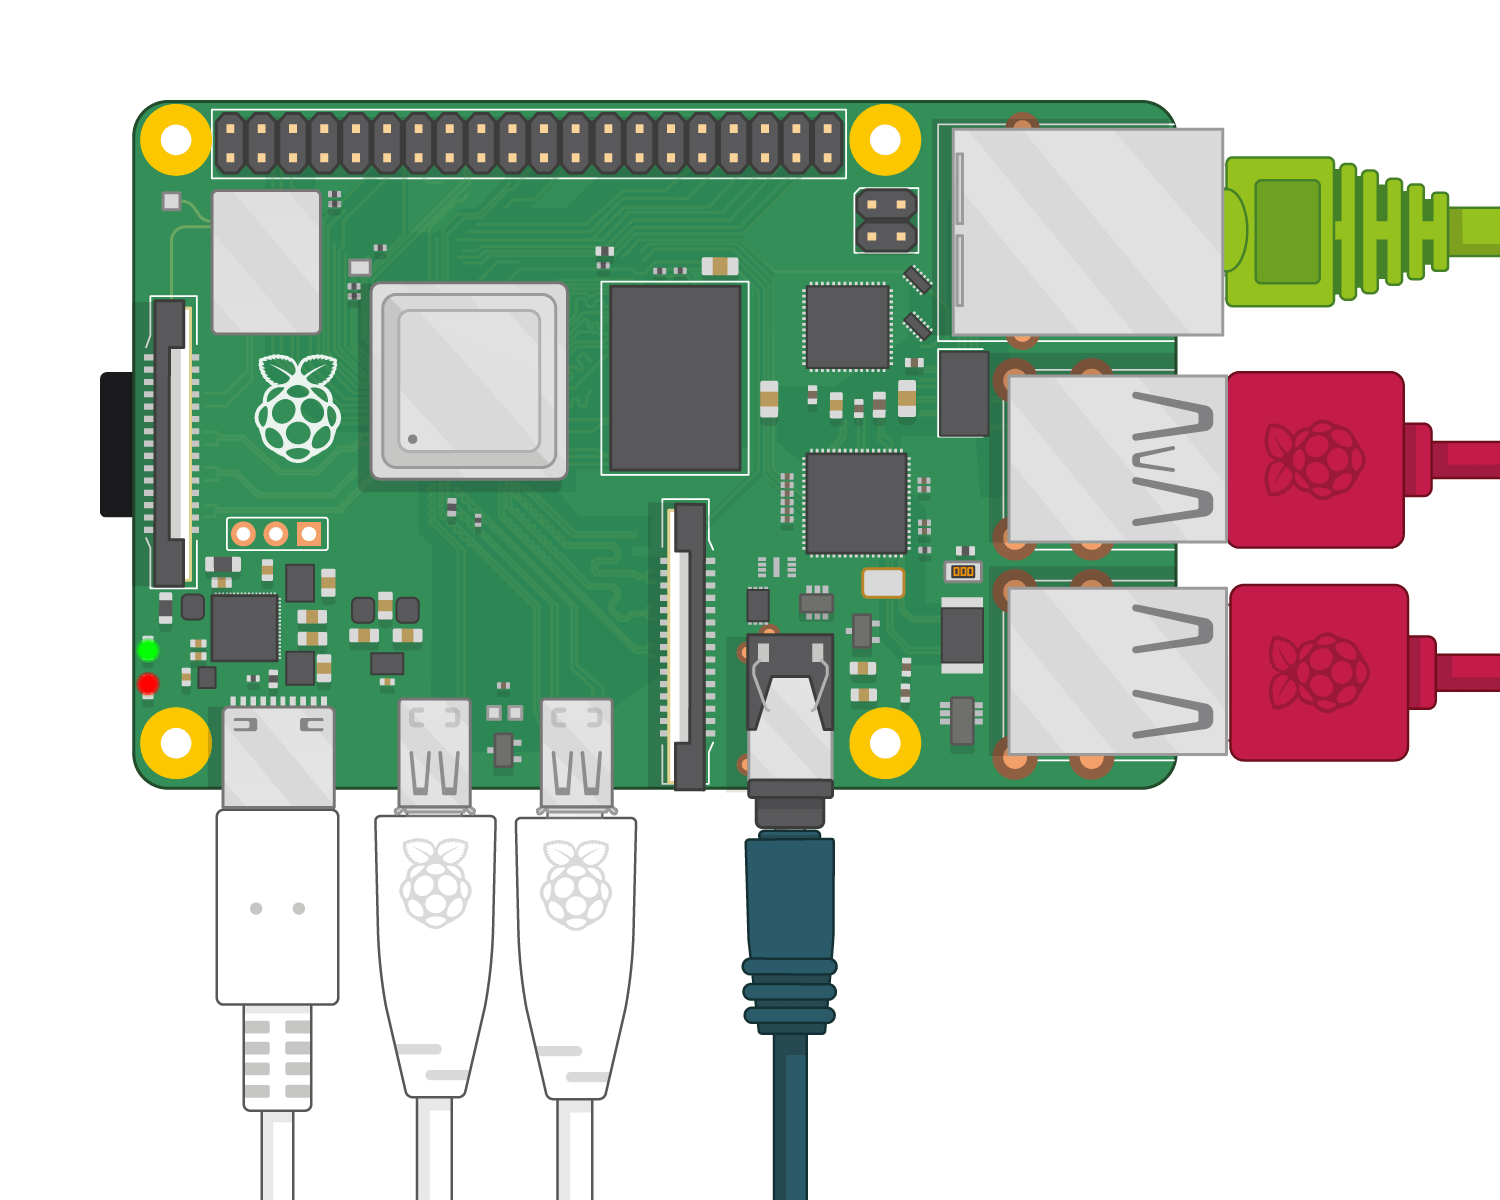
Raspberry Pi is a compact, affordable, and versatile single-board computer that is widely used in IoT projects. Its low power consumption, GPIO pins for interfacing with sensors, and support for multiple programming languages make it an ideal choice for IoT applications.
AWS, on the other hand, provides a robust and scalable cloud infrastructure that supports IoT deployments. With services like AWS IoT Core, AWS Lambda, and AWS VPC, you can build a secure and efficient IoT network without worrying about hardware limitations.
Using Raspberry Pi with AWS allows you to take advantage of both worlds. While Raspberry Pi handles data collection and local processing, AWS provides the cloud infrastructure for data storage, analysis, and remote access. This combination ensures that your IoT network is both cost-effective and reliable.
Read also:Valarie Ruvalcaba A Comprehensive Guide To Her Life Career And Achievements
Setting Up Your Raspberry Pi
Before you can connect your Raspberry Pi to AWS, you need to set it up properly. Follow these steps to prepare your Raspberry Pi for IoT applications:
Installing the Operating System
1. Download the Raspberry Pi Imager from the official Raspberry Pi website.
2. Insert a microSD card into your computer and use the imager to install the Raspberry Pi OS.
3. Once the OS is installed, insert the microSD card into your Raspberry Pi and power it on.
Configuring Network Settings
1. Connect your Raspberry Pi to a Wi-Fi network or Ethernet.
2. Update the system using the command: sudo apt update && sudo apt upgrade.
3. Install necessary packages like Python and SSH for remote access.
Testing the Setup
1. Verify that your Raspberry Pi can connect to the internet.
2. Test GPIO functionality by connecting a simple sensor and running a test script.
3. Ensure that SSH is enabled for remote management.
Configuring AWS VPC for IoT
To set up a secure IoT network, you need to configure your AWS VPC properly. Follow these steps:
Creating a VPC
1. Log in to your AWS Management Console and navigate to the VPC dashboard.
2. Click on "Create VPC" and define your IP address range, subnets, and route tables.
3. Enable DNS resolution and hostname support for easier device management.
Setting Up Security Groups
1. Create a security group for your IoT devices.
2. Define inbound and outbound rules to allow necessary traffic while blocking unauthorized access.
3. Assign the security group to your VPC and subnets.
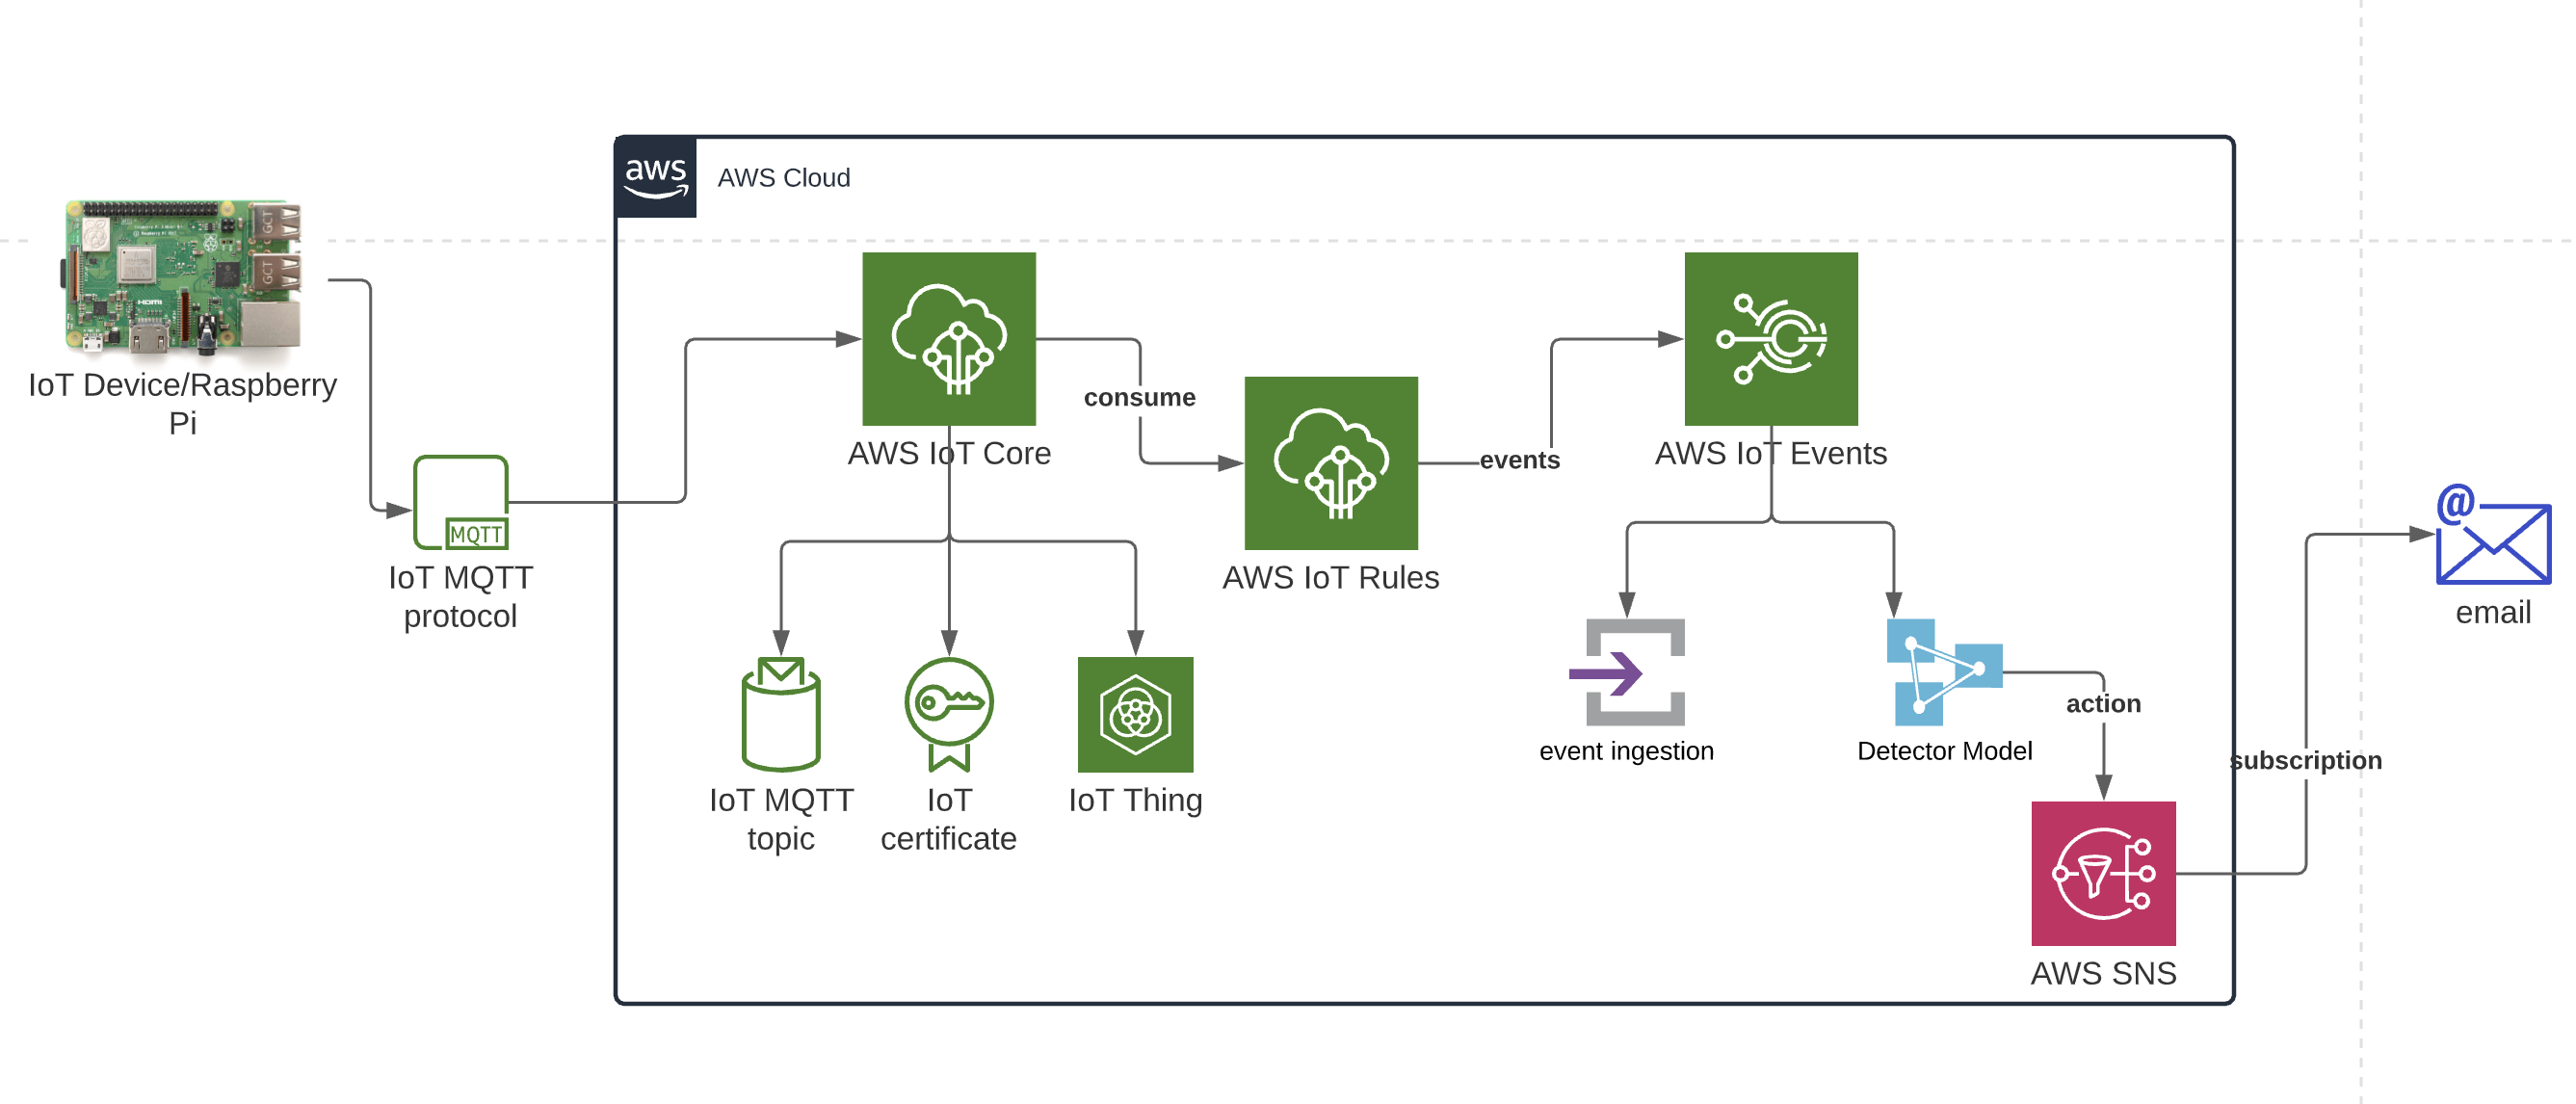
Integrating AWS IoT Core
1. Navigate to the AWS IoT Core dashboard and create a new thing.
2. Register your Raspberry Pi as an IoT device and download the necessary certificates.
3. Configure MQTT topics for communication between your Raspberry Pi and AWS.
Connecting Raspberry Pi to AWS
Once your Raspberry Pi and AWS VPC are ready, it’s time to connect them. Follow these steps:
Installing AWS SDK
1. Install the AWS SDK for Python (Boto3) using the command: pip install boto3.
2. Configure your AWS credentials on the Raspberry Pi using the AWS CLI.
3. Test the connection by running a sample script to fetch data from AWS.
Configuring MQTT Communication
1. Use the certificates downloaded from AWS IoT Core to authenticate your Raspberry Pi.
2. Write a Python script to publish and subscribe to MQTT topics.
3. Test the communication by sending sample data from your Raspberry Pi to AWS.
Automating Data Transfer
1. Use AWS Lambda to process incoming data from your Raspberry Pi.
2. Store processed data in an S3 bucket or DynamoDB for further analysis.
3. Set up CloudWatch alarms to monitor your IoT network in real-time.
Securing Your IoT Network
Security is a critical aspect of any IoT network. Here are some best practices to ensure your network is secure:
Encrypting Data
1. Use TLS/SSL encryption for all data transmitted between your Raspberry Pi and AWS.
2. Store sensitive data like API keys and certificates in a secure location.
3. Regularly update your Raspberry Pi’s operating system and software to patch vulnerabilities.
Implementing Access Controls
1. Use AWS IAM roles to define permissions for your IoT devices.
2. Enable multi-factor authentication (MFA) for your AWS account.
3. Restrict access to your VPC using security groups and network ACLs.
Monitoring for Threats
1. Use AWS CloudTrail to log all API calls and detect suspicious activity.
2. Set up AWS WAF to protect your network from web-based attacks.
3. Regularly review your security policies and update them as needed.
Monitoring and Maintenance
To ensure your IoT network runs smoothly, regular monitoring and maintenance are essential. Here’s how you can achieve this:
Using CloudWatch
1. Set up CloudWatch metrics to monitor CPU usage, memory, and network traffic.
2. Create dashboards to visualize key performance indicators (KPIs).
3. Configure alarms to notify you of any anomalies or issues.
Performing Regular Updates
1. Schedule regular updates for your Raspberry Pi’s operating system and software.
2. Test new updates in a staging environment before deploying them to production.
3. Keep a backup of your configuration files and data for disaster recovery.
Scaling Your Network
1. Use AWS Auto Scaling to handle increased traffic or device connections.
2. Add more subnets to your VPC as your network grows.
3. Optimize your AWS resources to reduce costs while maintaining performance.
Cost Considerations
While AWS offers a free tier, it’s important to understand the potential costs of running an IoT network. Here are some tips to keep your expenses in check:
Leveraging AWS Free Tier
1. Use the AWS Free Tier to access services like EC2, S3, and IoT Core for free.
2. Monitor your usage to avoid exceeding the free tier limits.
3. Explore AWS cost management tools to track your spending.
Optimizing Resource Usage
1. Use spot instances for non-critical tasks to save costs.
2. Delete unused resources like EC2 instances and S3 buckets.
3. Use AWS Budgets to set spending limits and receive alerts.
Choosing the Right Services
1. Select services that align with your project requirements.
2. Avoid over-provisioning resources to prevent unnecessary costs.
3. Regularly review your AWS architecture for optimization opportunities.
Real-World Applications
The combination of Raspberry Pi and AWS VPC can be used in various real-world applications. Here are some examples:
Smart Home Automation
1. Use Raspberry Pi to control smart devices like lights, thermostats, and cameras.
2. Store and analyze data on AWS for insights into energy usage and security.
3. Enable remote access to your smart home devices via AWS IoT Core.
Industrial IoT
1. Monitor industrial equipment using sensors connected to Raspberry Pi.
2. Use AWS for predictive maintenance and real-time analytics.
3. Implement secure communication between devices using AWS VPC.
Agriculture Monitoring
1. Deploy Raspberry Pi-based sensors to monitor soil moisture, temperature, and humidity.
2. Use AWS to analyze data and optimize irrigation and fertilization.
3. Enable remote monitoring of farms using IoT dashboards.
Conclusion
In this article, we explored how to set up a remote IoT VPC network using Raspberry Pi and free AWS services. By combining the processing power of Raspberry Pi with the robust infrastructure of AWS, you can create a secure, scalable, and cost-effective IoT network. This setup is ideal for applications ranging from smart home automation to industrial monitoring.
We covered everything from setting up your Raspberry Pi to configuring your AWS VPC and securing your IoT network. By following the steps outlined in this guide, you can build a network that is both reliable and efficient. Remember to monitor your network regularly and optimize your resources to keep costs in check.
Now that you have the knowledge and tools to build your IoT network, it’s time to take action. Start by setting up your Raspberry Pi and exploring the possibilities of AWS IoT Core. Share your experiences in the comments below or reach out if you have any questions. Happy building!